How to Winterize Outdoor Spigots Before Freezing (2026)
August 26th, 2026
Utah winters push overnight lows into the teens and 20s from November through February, and a hose bib you forget about is one of the fastest ways to end up with a cracked pipe inside your wall. Winterizing outdoor spigots takes 30 minutes and stops a repair that can run into the thousands once water gets behind drywall.
- Shutting off the interior valve and draining the line is the step most homeowners skip when they learn how to winterize outdoor spigots.
- Water expands roughly 9% when it freezes, which is enough pressure to split copper and PVC hose bibs overnight.
- Frost-free spigots still need the hose disconnected in 2026 — a connected hose traps water in the barrel and defeats the design.
- An insulated faucet cover plus a drained line is the combination that actually prevents a frozen or burst spigot, not the cover alone.
Why this matters
Outdoor spigots sit on exterior walls, which means they're the least insulated water line in the house. Once temperatures drop below 32°F for several hours, any water left standing in that line starts to freeze, expand, and put pressure on the pipe from the inside.
A burst spigot rarely shows up right away. The crack usually happens during a cold snap and the leak doesn't surface until the ice thaws in early 2026 spring weather — by then water has been running behind a wall or under a slab for weeks. If you've ever dealt with a burst pipe in winter, you know the repair bill dwarfs the ten minutes it takes to winterize a spigot in November.
What you'll need
- An insulated faucet cover (foam dome or fabric-wrapped, sized to fit standard hose bibs)
- Access to the interior shutoff valve for each outdoor spigot, if your home has one
- A garden hose key or bucket to catch residual water
- Pipe insulation sleeves for any exposed line running through an unheated garage or crawl space
- 20-30 minutes per spigot, more if the shutoff valve is hard to reach
If your home was built before frost-free spigots became standard, plan on the full shutoff-and-drain process below rather than just covering the faucet.
The steps
1. Disconnect every hose
A hose left attached over winter traps water in the spigot barrel, and that trapped water is exactly what splits frost-free units even though they're designed to resist freezing. Disconnect, drain, and coil hoses for indoor storage before the first hard freeze of the season. This is the single most common mistake homeowners make — they winterize the spigot but leave the hose connected.
2. Find the interior shutoff valve
Most homes built after the 1990s have a dedicated shutoff valve for each hose bib, usually in the basement, crawl space, or garage ceiling directly behind the exterior wall. Turn that valve clockwise until it stops. If you can't locate a dedicated valve, you'll need to work from the main water shutoff valve instead, which shuts off water to the entire house rather than just the spigot.
3. Open the outdoor spigot and drain the line
With the interior valve closed, go outside and open the spigot fully. Water still in the line between the valve and the faucet will drain out over a minute or two. Leave the spigot open through winter — an open valve gives any remaining moisture room to expand without pressure buildup, while a closed valve traps it.
4. Insulate exposed pipe
If the line running to the spigot passes through an unheated garage, crawl space, or unfinished basement, wrap it in foam pipe insulation sleeves. Keep interior spaces near exterior plumbing at 55°F or higher — that's the general threshold plumbers use to keep water lines from reaching freezing temperature even during a cold snap.
5. Install the insulated faucet cover
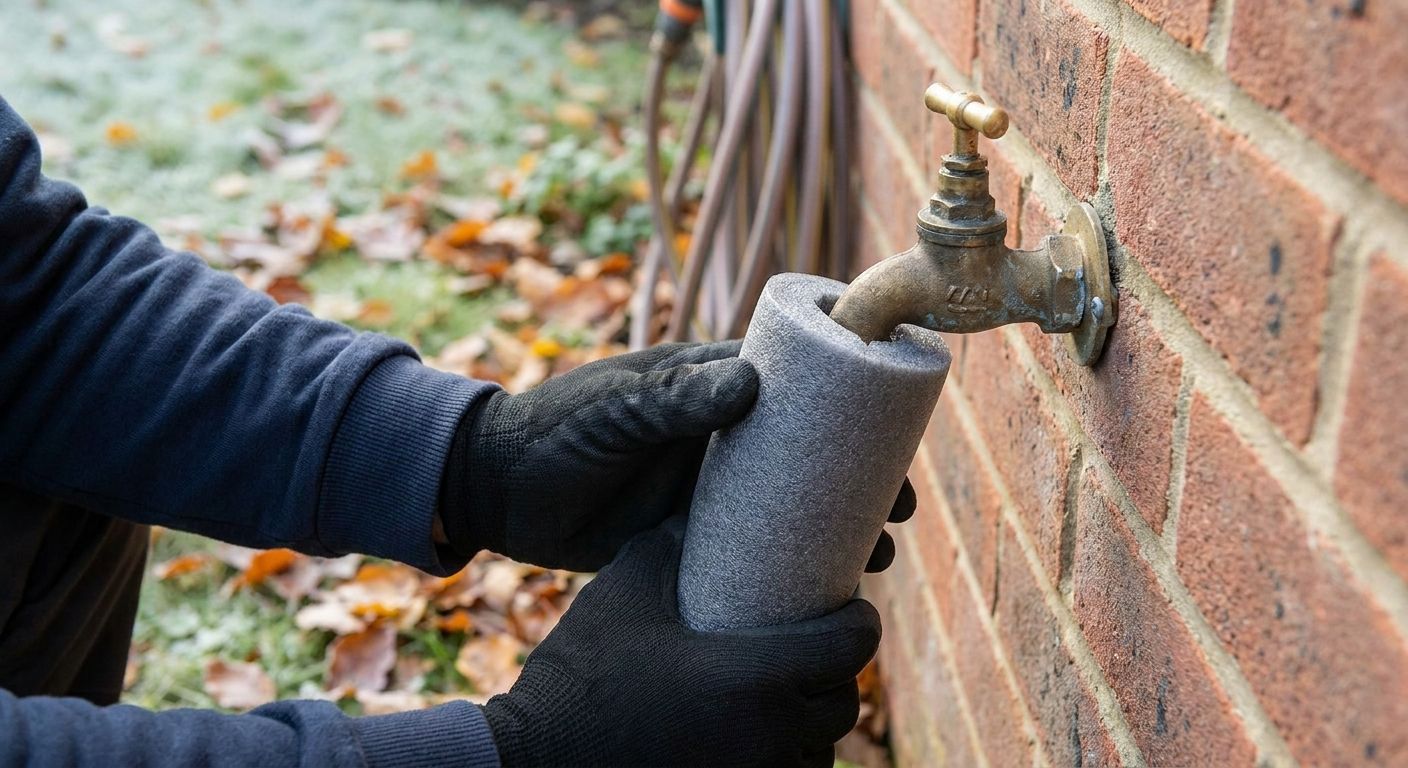
Slide the foam or fabric cover over the spigot and cinch the drawstring or strap tight against the wall. This traps a pocket of warmer air around the fixture and blocks direct exposure to wind chill, which drops the effective temperature at the spigot well below the ambient air reading.
6. Test frost-free spigots for proper drainage
Frost-free hose bibs have the actual shutoff valve set back 6-12 inches inside the wall, so the exposed barrel drains automatically once the hose is off. Confirm the spigot is angled slightly downward — if it's level or angled up, water pools in the barrel instead of draining, and the frost-free design stops working.
7. Recheck after the first hard freeze
Once overnight temperatures hit the low 20s for the first time in the season, walk the exterior of the house and check every spigot for frost buildup, dripping, or a cracked cover. Catching a problem after the first freeze — not the third — is what keeps a small issue from becoming a wall repair.
Get your plumbing checked before the freeze
Schedule an inspection before the next Utah cold snap hits.
Troubleshooting
Spigot still drips after you've shut off the interior valve. The valve isn't fully closed or it's failing internally — a valve that won't hold pressure needs replacing before winter, not after a freeze.
No interior shutoff valve exists for the spigot. Common in homes built before the 1980s. Use the main water valve for that fixture during freeze warnings, or have a shutoff added to that line ahead of the 2026-2027 winter season.
Faucet cover keeps blowing off in wind. Switch to a cover with an adjustable strap or drawstring rather than a snap-on dome — Utah's canyon winds routinely exceed what a friction-fit cover can handle.
Water pressure dropped at other fixtures after you closed the spigot valve. That's usually unrelated sediment or a partially closed valve elsewhere in the system — check the details in this guide to fixing low water pressure at home before assuming the spigot work caused it.
Spigot froze solid before you got to it. Don't use an open flame to thaw it. A hair dryer on low heat, applied slowly from the faucet inward, is the safe method — check for cracks in the fitting before restoring full water pressure.
House still has polybutylene supply lines feeding the exterior wall. Polybutylene is more prone to failure under freeze pressure than copper or PEX. If your home falls into that category, look at polybutylene pipe replacement for older Utah homes before winter rather than after a leak.
Tools and resources
- Insulated faucet covers and foam pipe sleeves, available at any hardware store
- A hose bib key for spigots without a lever handle
- The main water shutoff valve guide if your spigot lacks its own isolation valve
- A flashlight for locating shutoff valves in dark crawl spaces and basement ceilings
What to do next
Winterizing the spigot is one piece of cold-weather prep. If you've never confirmed where your home's main shutoff is, do that next — it's the single fastest fix during any winter plumbing emergency, spigot-related or not. Expert Services covers plumbing, HVAC, and electrical work across Northern Utah, so a pre-winter check can cover more than just the hose bibs.
FAQ
How do you winterize outdoor spigots?
Disconnect the hose, shut off the interior valve feeding the spigot, drain the remaining water from the line, and install an insulated faucet cover. Doing all four steps matters — a cover alone won’t stop a line that’s still full of water from freezing.
Do frost-free spigots need to be winterized?
Yes, the hose still needs to be disconnected even on frost-free hose bibs. A connected hose traps water in the barrel, which defeats the frost-free design and can still crack the fitting in 2026 winter conditions.
At what temperature do outdoor spigots freeze?
Water in an exposed pipe starts freezing at 32°F, but wind chill can drop the effective temperature at the spigot well below the air temperature reading. Several hours below freezing is enough for standing water in the line to freeze and expand.
Can a frozen spigot burst without you knowing?
Yes. The crack usually forms during the freeze but doesn’t leak until the ice thaws, so damage can sit behind a wall for weeks before it’s noticed. That’s why checking spigots after the first hard freeze of the season matters as much as winterizing them in fall.
Is it too late to winterize a spigot in December?
No — winterize it as soon as you notice it’s been missed, even mid-winter. The risk only applies during active freeze events, so closing the interior valve and draining the line still protects the fixture for the rest of the 2026 season.
What happens if you don’t winterize outdoor spigots?
Standing water in the line can freeze, expand by roughly 9%, and crack the pipe or fitting. The resulting leak often isn’t visible until a thaw, which means water damage can accumulate before you find the source.
Do I need a plumber to winterize a spigot?
Most homeowners can do it themselves if there’s an accessible interior shutoff valve. If you can’t locate one or the spigot has no separate valve at all, a licensed plumber can add one before the next freeze.
How often should outdoor spigots be checked during winter?
Check them after the first hard freeze of the season and again after any extended cold snap below 20°F. A quick visual check for frost, cracks, or dripping takes under five minutes per spigot.
One last thing
The detail most people miss isn't the cover — it's leaving the spigot open after draining it. A closed valve on an empty line still lets any residual moisture turn to ice with nowhere to expand except the fitting itself. Leave it open through the whole 2026 winter season and close it again only once nighttime lows are reliably above freezing.
Related guides
- Emergency plumber for burst pipes in winter
- How to shut off your home's main water valve in an emergency
- Polybutylene pipe replacement for older Utah homes
- How to fix low water pressure at home